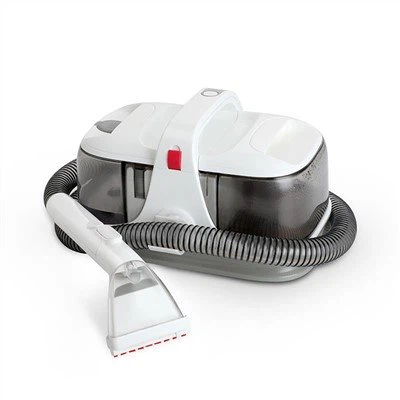
As a trusted supplier of hardfloor washers, I'm excited to share a comprehensive guide on how to assemble a hardfloor washer. Whether you're a professional cleaner or a homeowner looking to keep your floors spotless, understanding the assembly process is crucial. In this blog, I'll walk you through each step, ensuring you can get your Electric Hard Floor Washer up and running smoothly.
Step 1: Gather Your Tools and Parts
Before you begin the assembly, it's essential to gather all the necessary tools and parts. Most hardfloor washers come with a detailed instruction manual that lists everything you'll need. Typically, you'll require a Phillips head screwdriver, a flathead screwdriver, and possibly an Allen wrench. Lay out all the parts on a clean, flat surface, and familiarize yourself with each component. This will make the assembly process much more efficient and prevent any confusion.
Step 2: Identify the Main Components
The main components of a Hard Floor Washer Cleaner usually include the base unit, the handle, the solution tank, the recovery tank, and the cleaning pads. The base unit is the heart of the washer, housing the motor, the brushes, and the suction mechanism. The handle allows you to maneuver the washer around your floors, while the solution tank holds the cleaning solution, and the recovery tank collects the dirty water. The cleaning pads are attached to the bottom of the base unit and are responsible for scrubbing and cleaning the floors.
Step 3: Attach the Handle to the Base Unit
The first step in the assembly process is to attach the handle to the base unit. Most hardfloor washers have a simple locking mechanism that allows you to easily connect the handle to the base. Align the holes on the handle with the corresponding holes on the base unit, and insert the screws or bolts provided. Use the appropriate screwdriver or wrench to tighten the screws securely. Make sure the handle is firmly attached and does not wobble or move.
Step 4: Install the Solution and Recovery Tanks
Next, you'll need to install the solution and recovery tanks. The solution tank is usually located at the front of the base unit, while the recovery tank is located at the back. Remove the caps from both tanks and fill the solution tank with the appropriate cleaning solution. Follow the manufacturer's instructions for the correct dilution ratio. Once the solution tank is filled, replace the cap and insert the tank into the designated slot on the base unit. Make sure the tank is securely in place and does not leak.
The recovery tank is installed in a similar manner. Remove the cap from the recovery tank and insert it into the slot at the back of the base unit. Ensure that the tank is properly seated and that the seal is tight. The recovery tank is responsible for collecting the dirty water and debris from the floors, so it's important to make sure it is installed correctly.
Step 5: Attach the Cleaning Pads
The cleaning pads are an essential part of the hardfloor washer, as they are responsible for scrubbing and cleaning the floors. Most hardfloor washers come with two or more cleaning pads, which are typically made of microfiber or other absorbent materials. To attach the cleaning pads, locate the pad holder on the bottom of the base unit. Align the cleaning pad with the pad holder and press it firmly into place. Make sure the pad is securely attached and does not come loose during operation.
Step 6: Connect the Power Cord
Once all the components are assembled, it's time to connect the power cord. Locate the power cord outlet on the base unit and plug in the power cord. Make sure the cord is properly inserted and that there are no loose connections. Before turning on the washer, double-check that all the components are securely assembled and that the solution and recovery tanks are properly installed.


Step 7: Test the Washer
Before using the hardfloor washer on your floors, it's important to test it to ensure that it is working properly. Turn on the washer and let it run for a few minutes. Check that the brushes are spinning, the suction is working, and that the cleaning solution is being dispensed evenly. If you notice any issues, such as a lack of suction or a malfunctioning brush, refer to the instruction manual for troubleshooting tips.
Step 8: Start Cleaning
Once you've tested the washer and are satisfied that it is working properly, you're ready to start cleaning your floors. Push the washer forward slowly, allowing the brushes to scrub the floors and the suction to remove the dirty water and debris. Move the washer in a back-and-forth motion, covering the entire floor area. Make sure to overlap each pass to ensure that the floors are thoroughly cleaned.
Tips for Using Your Hardfloor Washer
- Read the Instruction Manual: Before using your hardfloor washer, make sure to read the instruction manual carefully. This will ensure that you understand how to operate the washer safely and effectively.
- Use the Right Cleaning Solution: Different types of floors require different types of cleaning solutions. Make sure to use the cleaning solution recommended by the manufacturer for your specific type of floor.
- Empty the Recovery Tank Regularly: The recovery tank collects the dirty water and debris from the floors. Make sure to empty the tank regularly to prevent it from overflowing and to ensure that the suction remains strong.
- Clean the Cleaning Pads: After each use, remove the cleaning pads from the washer and wash them in warm, soapy water. This will help to remove any dirt and debris and keep the pads clean and effective.
- Store the Washer Properly: When not in use, store the hardfloor washer in a dry, cool place. Make sure to unplug the power cord and empty the solution and recovery tanks.
Conclusion
Assembling a Hard Floor Mop Machine is a relatively simple process that can be completed in a few easy steps. By following the instructions provided in this blog, you'll be able to assemble your hardfloor washer quickly and easily, and start cleaning your floors in no time. If you have any questions or need further assistance, please don't hesitate to contact us. We're here to help you get the most out of your hardfloor washer and keep your floors looking their best.
If you're interested in purchasing a hardfloor washer or have any questions about our products, please feel free to contact us. We'd be happy to discuss your needs and provide you with a quote. Our team of experts is always available to answer any questions you may have and to help you find the right hardfloor washer for your specific requirements.
References
- Manufacturer's instruction manual for the hardfloor washer
- Industry best practices for assembling and using hardfloor washers